External Hardware Gamebot
Introduction
A while ago, I came across a video on YouTube about using image recognition on a Raspberry Pi to build an aimbot. What caught my attention wasn’t the aimbot itself, but the workaround to modern anti-cheat systems. These systems have become so advanced that people now build “fully external” solutions, meaning nothing runs on the game PC at all. Instead, everything happens on an external device like a Raspberry Pi.
That concept got me curious. I’m not into cheating, especially in competitive games like shooters. But the technical challenge intrigued me. I wanted to explore the idea, starting with something simpler and more nostalgic. That’s when I thought of World of Warcraft, a game I poured countless hours into during my youth.
So, I decided to build a WoW fishing bot.
The goal: a bot that runs completely on a Raspberry Pi, uses image recognition to detect the bobber and splashes, and sends input by emulating a physical keyboard. No software on the PC, no detectable code running alongside the game. From the system’s perspective, it should look exactly like a human playing.
This post describes that journey: building a hardware-powered, stealthy proof of concept fishing bot for World of Warcraft. You can find all source code on my Github
Project Overview
The project consists of three main components:
- Screen Capturing – Grabbing live video output from the game without installing anything on the PC.
- HID Emulation – Making the Raspberry Pi act like a USB keyboard to send keystrokes to the game.
- Image Recognition – Using OpenCV to detect the fishing bobber and the splash that indicates a bite.
I’ll break down each part of the system in detail in the following sections.
Hardware Stack
To make this work, I wired up the following setup:
- A PC running World of Warcraft
- A Raspberry Pi 5 connected via USB-C (provides power and acts as a USB device for HID input)
- The PC’s HDMI output is connected to the Pi using a Geekworm C790 HDMI-to-CSI-2 adapter
- The Raspberry Pi captures the video feed and runs image recognition with OpenCV
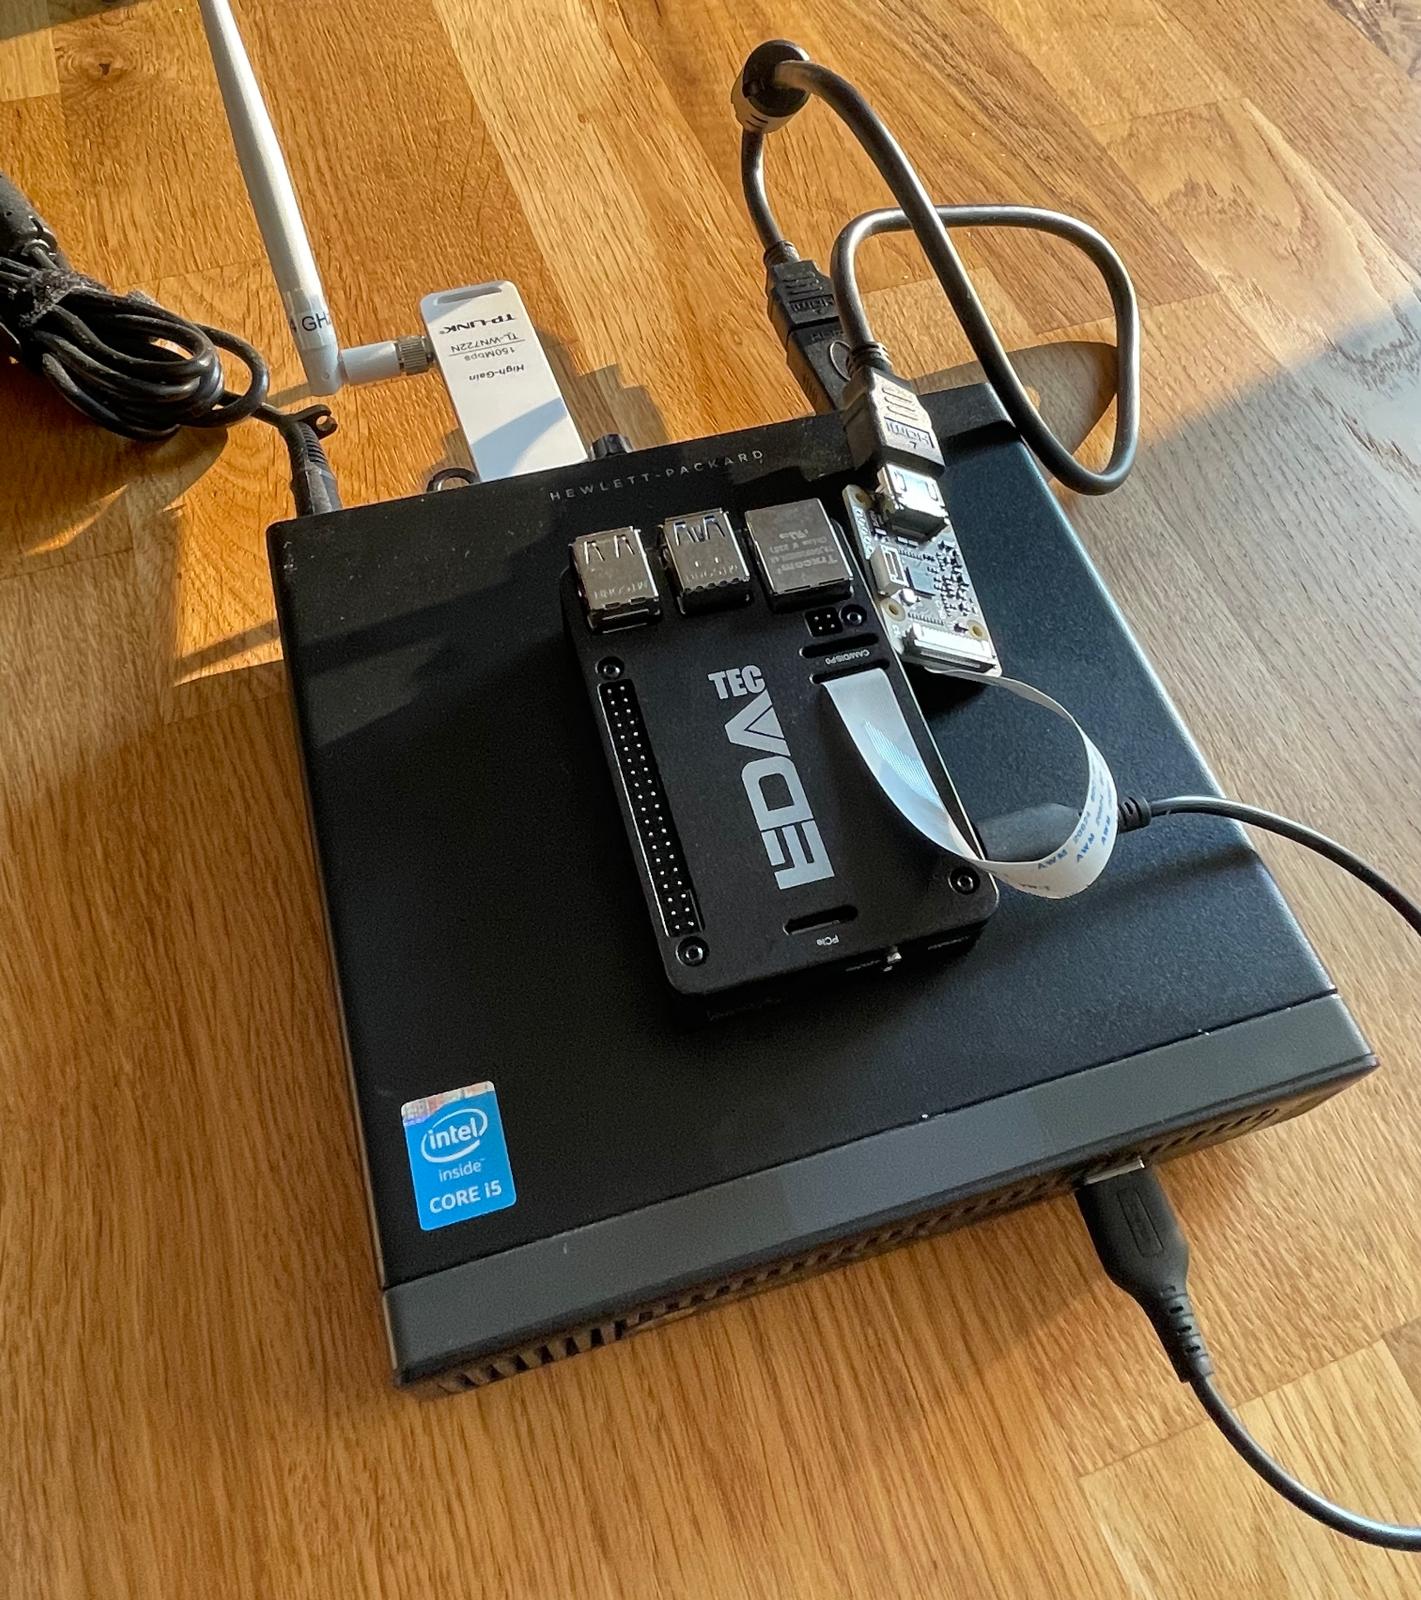 My hardware setup for the fishing bot
Screen Capturing
To capture video output from the PC, I’m using the CSI-2 (Camera Serial Interface 2) bus on the Raspberry Pi 5. It’s a high-speed interface typically used to connect camera modules, but with the HDMI-to-CSI-2 adapter, I can feed HDMI input into the Pi. The adapter supports up to 1080p at 60Hz, though for this project we only need a small fraction of that frame rate.
The C790 board is connected to the Raspberry Pi’s CMI/DISP1 port. Some community reports mention it won’t work reliably on port 0, so make sure to use port 1.
To enable the HDMI input on the Pi, you’ll need to configure it properly:
-
Open the configuration file:
sudo nano /boot/firmware/config.txt -
Add or modify the following entries:
dtparam=i2c_arm=on dtparam=i2s=on dtparam=spi=on dtparam=i2c_baudrate=10000 dtparam=i2c_vc=on camera_auto_detect=0 dtoverlay=vc4-kms-v3d,cma-512 max_framebuffers=2 [all] dtoverlay=tc358743,4lane=1 dtoverlay=tc358743-audio -
Run the provided script to enable HDMI input:
./scripts/enablehdmi.sh
To verify everything is working, I wrote a small test program in Python using OpenCV to capture frames:
We are now be able to capture live frames from the HDMI input.
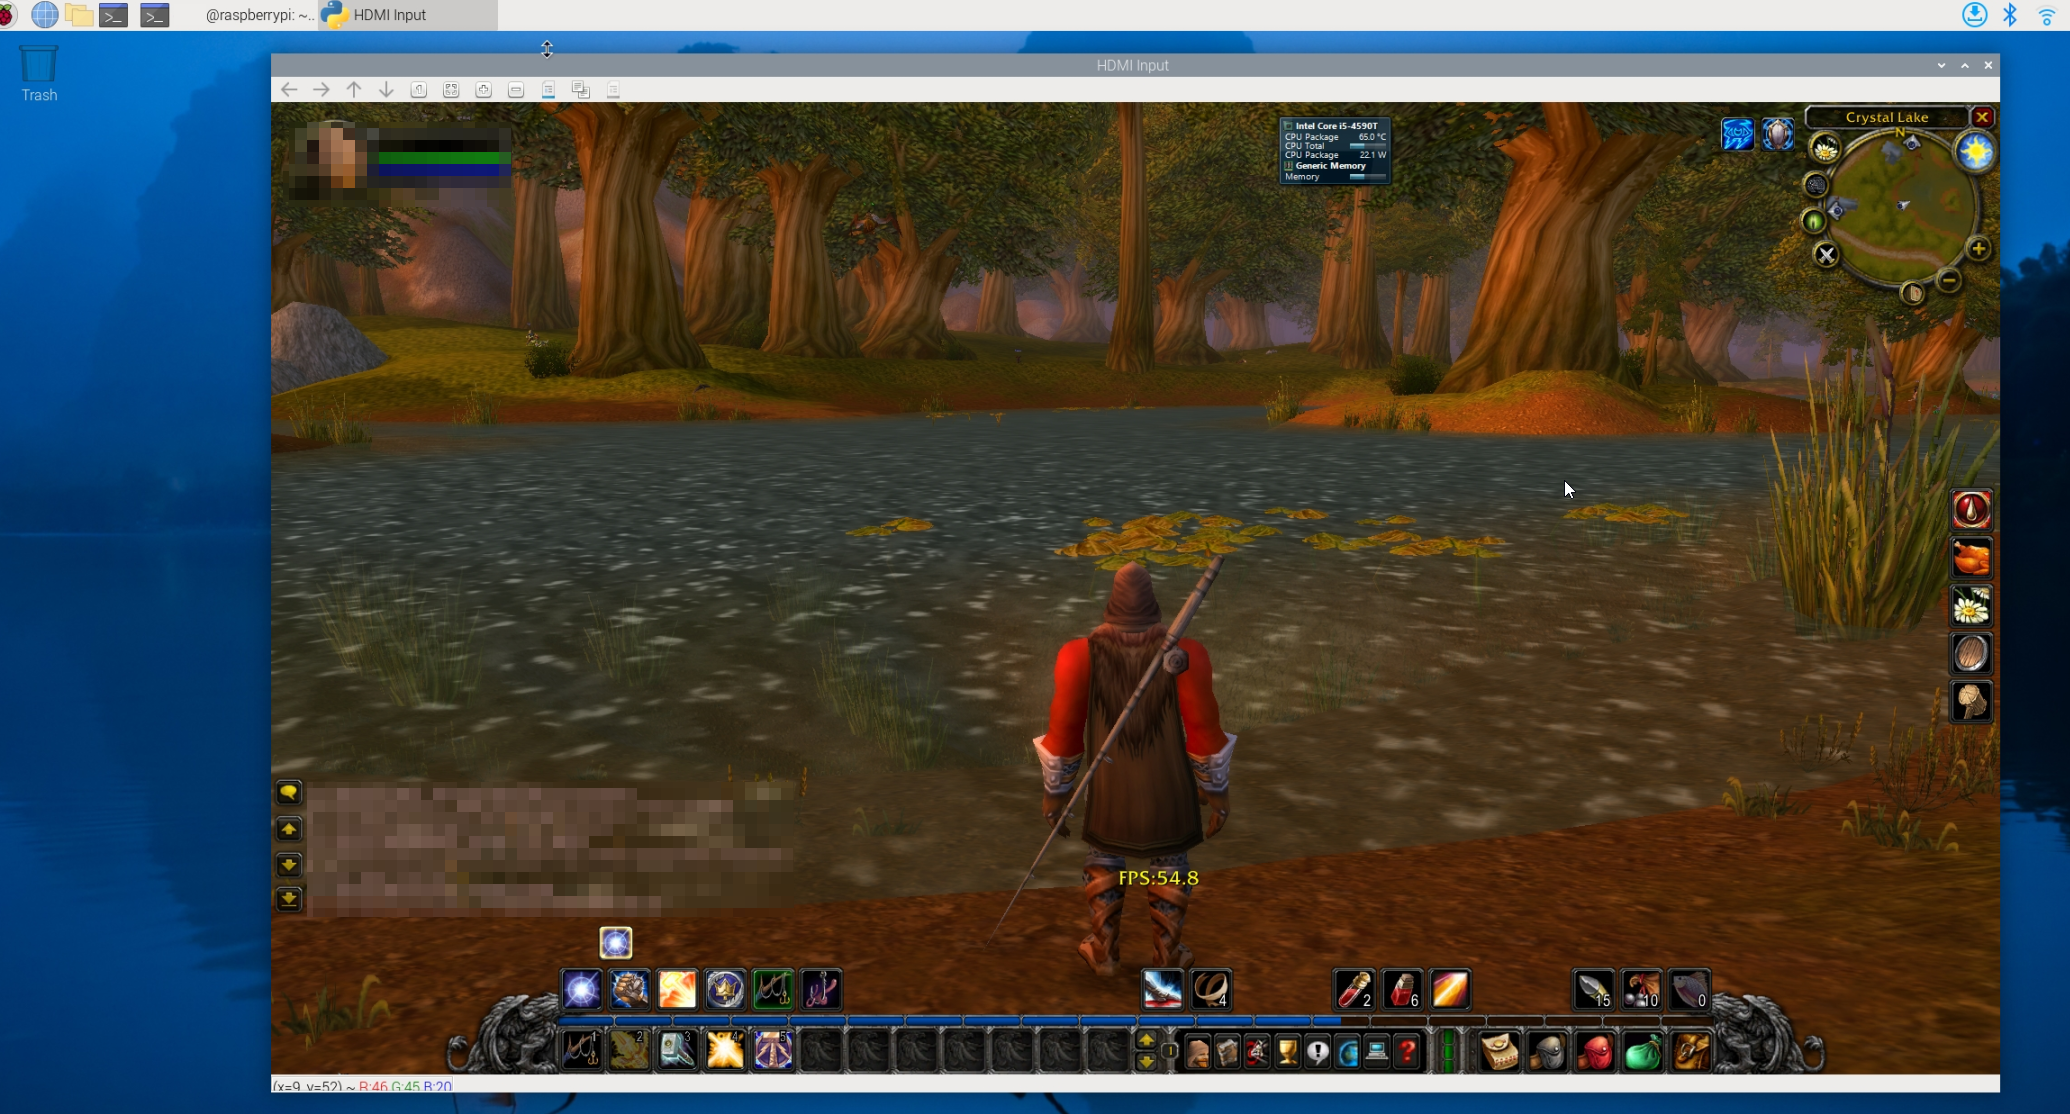 Working HDMI input on Raspberry Pi.
HID Emulation
Next, I needed to figure out how to send keyboard and mouse input to the computer running the game. While many people use Arduino boards to emulate HID devices and send commands over UART, I opted for a cleaner solution using the Raspberry Pi itself. By leveraging Linux USB gadget support, I can emulate both a keyboard and a mouse directly from the Pi.
To activate USB HID functionality:
-
Add the following line to
/boot/firmware/config.txt:dtoverlay=dwc2 -
Append this to the end of
/boot/firmware/cmdline.txt:modules-load=dwc2 -
Add
libcompositeto/etc/modulesto ensure the necessary kernel module is loaded at boot.
I then created a setup script scripts/start-hid-gadget.sh to initialize the USB HID gadget. It configures USB descriptors, creates keyboard and mouse interfaces, and activates the composite device:
#!/bin/bash

# Check if already running
if [ -d /sys/kernel/config/usb_gadget/pi-hid ]; then
    echo "USB HID gadget is already active"
    exit 1
fi

# Create gadget
mkdir -p /sys/kernel/config/usb_gadget/pi-hid
cd /sys/kernel/config/usb_gadget/pi-hid

# Set USB device descriptor
echo 0x1d6b > idVendor  # Linux Foundation
echo 0x0104 > idProduct # Composite Gadget
echo 0x0100 > bcdDevice # v1.0.0
echo 0x0200 > bcdUSB    # USB2

# Set device information
mkdir -p strings/0x409
echo "fedcba9876543210" > strings/0x409/serialnumber
echo "Raspberry Pi Foundation" > strings/0x409/manufacturer
echo "Pi HID Gadget" > strings/0x409/product

# Create configuration
mkdir -p configs/c.1/strings/0x409
echo "Config 1: HID Composite" > configs/c.1/strings/0x409/configuration
echo 250 > configs/c.1/MaxPower

# Create keyboard function
mkdir -p functions/hid.keyboard
echo 1 > functions/hid.keyboard/protocol
echo 1 > functions/hid.keyboard/subclass
echo 8 > functions/hid.keyboard/report_length
echo -ne \x05\x01\x09\x06\xa1\x01\x05\x07\x19\xe0\x29\xe7... > functions/hid.keyboard/report_desc

# Create mouse function
mkdir -p functions/hid.mouse
echo 2 > functions/hid.mouse/protocol
echo 1 > functions/hid.mouse/subclass
echo 4 > functions/hid.mouse/report_length
echo -ne \x05\x01\x09\x02\xa1\x01\x09\x01\xa1\x00... > functions/hid.mouse/report_desc

# Link functions to configuration
ln -s functions/hid.keyboard configs/c.1/
ln -s functions/hid.mouse configs/c.1/

# Enable gadget
ls /sys/class/udc > UDC

echo "USB HID gadget started successfully"
echo "Keyboard device: /dev/hidg0"
echo "Mouse device: /dev/hidg1"
This script sets up the USB composite device and defines HID descriptors for both a keyboard and a mouse.
To enhance stealth, you could replace the idVendor, idProduct, and string descriptors to mimic a well-known mouse and keyboard.
I also wrote stop-hid-gadget.sh to disable the gadget and status-hid-gadget.sh to check if it’s active.
To allow non-root access for our application later, a udev rule has to be created in /etc/udev/rules.d/99-hidg.rules:
KERNEL=="hidg*", MODE="0666"
Then reload the rules:
sudo udevadm control --reload-rules
sudo udevadm trigger
Testing the HID devices
To press the letter ‘h’:
# Press 'h'
echo -ne '\x00\x00\x0b\x00\x00\x00\x00\x00' | sudo tee /dev/hidg0 > /dev/null
# Release all keys
echo -ne '\x00\x00\x00\x00\x00\x00\x00\x00' | sudo tee /dev/hidg0 > /dev/null
To move the mouse 200 pixels to the right:
# Move right 200 pixels (in chunks of 100)
echo -ne '\x00\x64\x00\x00' | sudo tee /dev/hidg1 > /dev/null
sleep 0.01
echo -ne '\x00\x64\x00\x00' | sudo tee /dev/hidg1 > /dev/null
Make sure mouse speed in Windows is set to 10/20 and “Enhance Pointer Precision” is disabled to ensure consistent movement. Later on in the bot I use Rust to send these HID reports—see src/keyboard.rs and src/mouse.rs.
Image Recognition and Putting It All Together
With screen capturing and HID emulation working, the last and most crucial piece is image recognition. This is where the bot actually becomes intelligent—detecting visual cues in the game to know when and where to act. The entire bot application is written in Rust and based on a previous fishing-bot I wrote.
What the Bot Needs to Do:
- Cast fishing.
- Capture a frame and detect the bobber on screen.
- Move the mouse cursor onto the bobber.
- Continuously capture frames and wait for a splash (indicating a fish bite).
- Right-click to loot the fish.
- Repeat.
Frame Capture
The frame capture process is similar to the Python test code but translated to Rust. One small trick: to avoid capturing stale frames, the bot grabs a few frames from the buffer before processing one. Without this, I noticed lag where it would act on an outdated frame. We will also directly convert the capture to grayscale for further processing.
/// Captures a single frame from the video capture device
fn capture_frame(cap: &mut VideoCapture) -> Result<Mat, Box<dyn Error>> {
    // Create matrix to hold the frame
    let mut frame = Mat::default();

    // This is a little hack but we have to some how grab a few frames
    // before we decode it. Otherwise we might get an old frame.
    for _ in 0..5 {
        cap.grab()?;
    }

    // Now decode the latest frame we grabbed
    cap.retrieve(&mut frame, 0)?;

    // Check if frame is empty
    if frame.empty() {
        eprintln!("Error: Captured frame is empty");
        return Err("Empty frame captured".into());
    }

    // Convert to grayscale for image processing
    let mut frame_gray = Mat::default();
    imgproc::cvt_color(&frame, &mut frame_gray, imgproc::COLOR_BGR2GRAY, 0)?;

    Ok(frame_gray)
}
Optimizing for Visual Detection
To improve accuracy, I recommend tweaking your game settings:
- Turn off weather effects entirely.
- Reduce or disable shaders.
- For Vanilla WoW, consider using smoother water textures like these.
- Zoom the camera all the way in.
- Hide the interface (
Alt + Z).
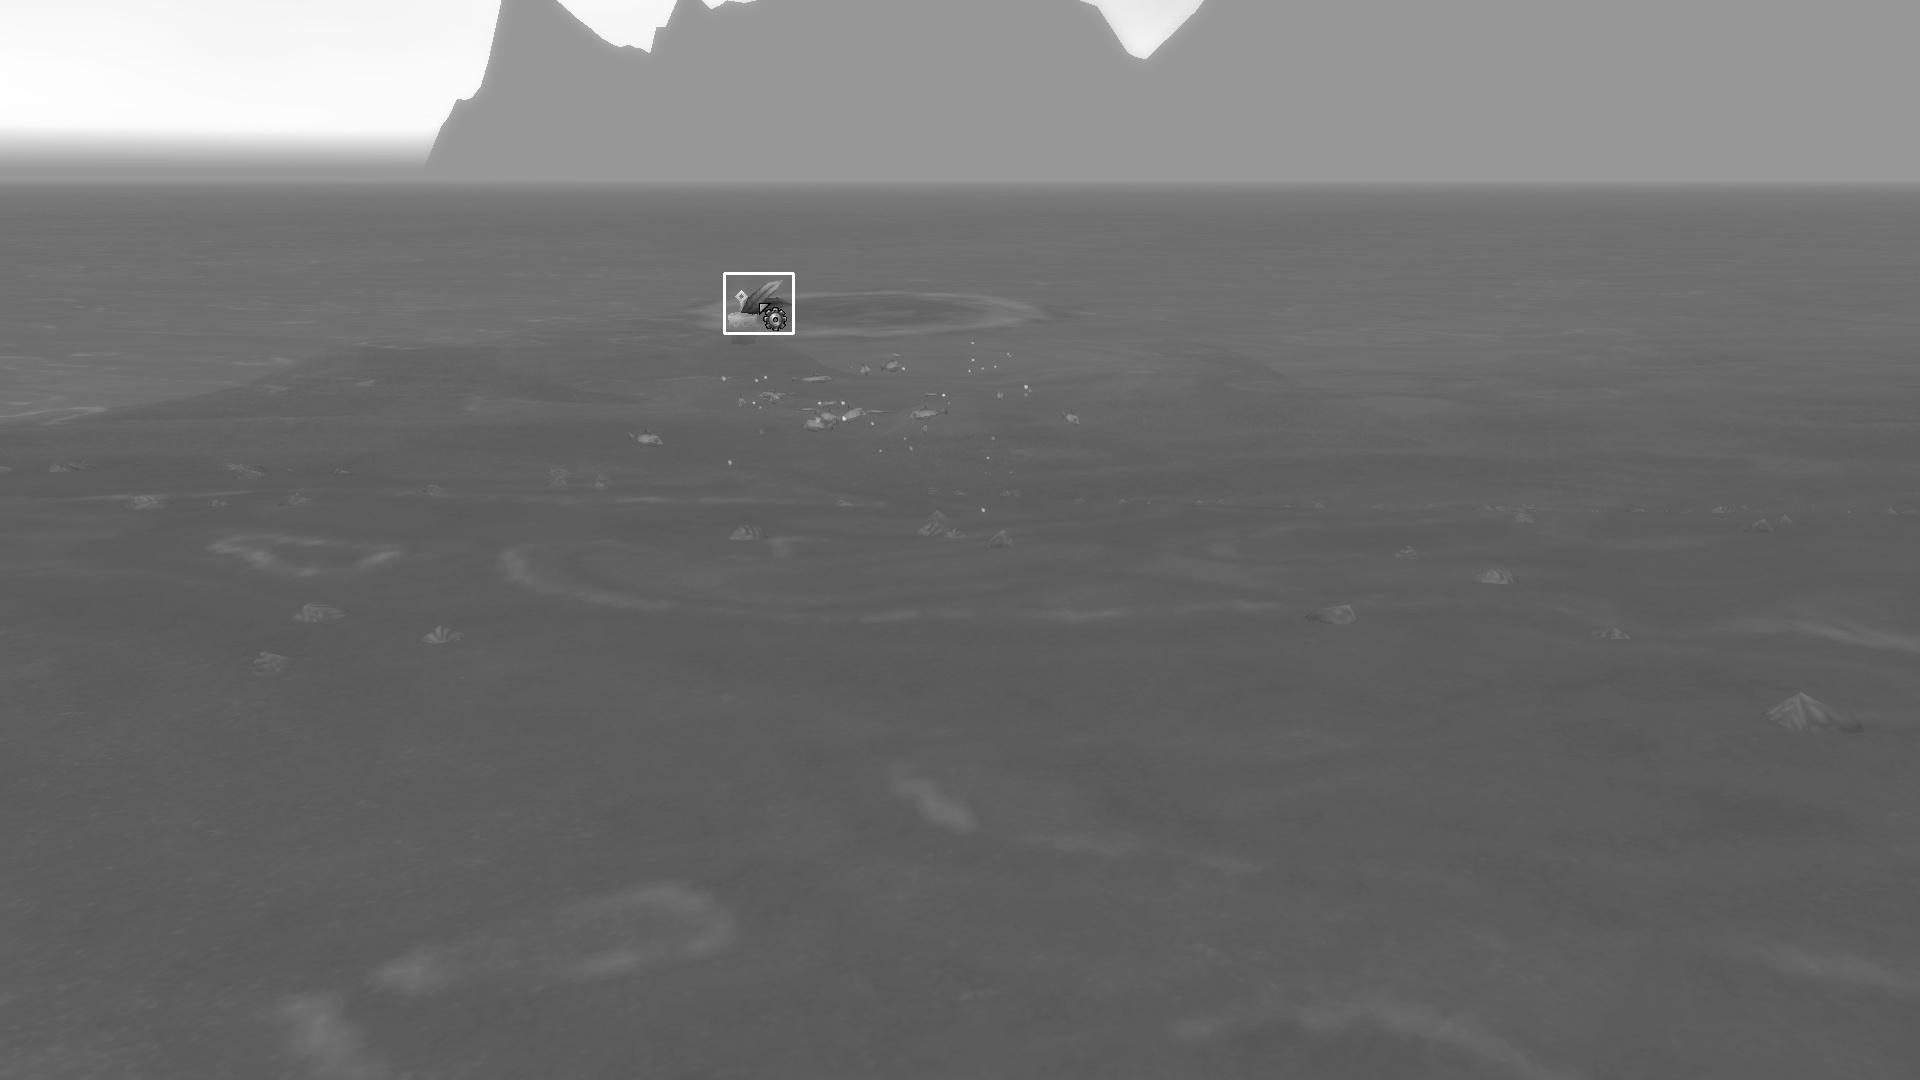 Captured screen converted into gray scale.
Bobber Detection with OpenCV
Detecting the bobber is a basic task once the scene is optimized. Instead of color matching (which is unreliable due to lighting changes), I use Canny edge detection.
Why Canny? It highlights boundaries by detecting rapid changes in pixel intensity. This makes the bobber stand out as a sharp-edged object even when lighting or water movement varies.
Running the algorithm on a screen capture gives you a clean outline of the scene, where the bobber becomes identifiable.
 Output from the canny edge detection.
Template Matching
Next, we need a few templates to compare against using the template matching algorithm. These are highly dependent on graphics settings, screen resolution, and the in-game environment. All templates are stored in the templates subfolder.
 Different templates for template matching.
These templates are loaded during startup and passed through the same Canny edge detection as the live frames.
 Canny edge applied to templates.
Using imgproc::match_template, the bot compares the captured frame against each template. Template matching finds regions in the image that closely match the template and returns the coordinates of the best match. This gives us a rectangle where the bobber is most likely located.
Once the bobber is found, we move the mouse to that position using our HID mouse emulation.
To detect a fish bite, we monitor the bobber area by continuously capturing frames and calculating the pixel difference between them. If enough pixels change significantly, it suggests movement resembling a splash.
/// Detects if a fish has "splashed" by comparing two consecutive frames
/// A splash is detected as significant movement/change in the bobber area
fn detect_splash(prev_frame: &Mat, current_frame: &Mat, rect: Rect) -> Result<bool, Box<dyn Error>> {
// Calculate the absolute difference between frames
let mut diff_frame = Mat::default();
core::absdiff(prev_frame, current_frame, &mut diff_frame)?;
// Extract the region of interest (ROI) around the bobber
let roi = Mat::roi(&diff_frame, rect)?;
// Apply threshold to convert differences to binary (black/white)
let mut thresh_frame = Mat::default();
imgproc::threshold(&roi, &mut thresh_frame, 50.0, 255.0, imgproc::THRESH_BINARY)?;
// Count non-zero pixels (white pixels indicating movement)
let non_zero_count = core::count_non_zero(&thresh_frame)?;
// If enough pixels changed, consider it a splash
let splash_detected = non_zero_count > 250; // Todo: Adjust this threshold based on experimentation
print!("{:?} ", non_zero_count);
Ok(splash_detected)
}
/// Continuously monitors for a fish splash within the specified timeout period
fn wait_for_splash(
cap: &mut VideoCapture,
lure_location_rect: Rect,
timeout: Duration
) -> Result<bool, Box<dyn std::error::Error>> {
// Capture initial frame for comparison
let mut prev_frame = capture_frame(cap)?;
let start_time = Instant::now();
// Keep checking for splashes until timeout
while Instant::now().duration_since(start_time) < timeout {
let current_frame = capture_frame(cap)?;
// Check if a splash occurred
if detect_splash(&prev_frame, ¤t_frame, lure_location_rect)? {
println!("Splash detected!");
return Ok(true);
}
// Update previous frame for next comparison
prev_frame = current_frame;
// Small delay between checks to avoid excessive CPU usage
sleep(Duration::from_millis(50));
}
Ok(false) // Timeout occurred without detecting a splash
}
When a splash is detected, the bot sends a right-click via HID to catch the fish.
Then the cycle repeats. Putting this all together I got the following simple main routine:
ifn main() -> Result<(), Box<dyn std::error::Error>> {
    let timeout = Duration::from_secs(29);

    // Initalise HID gadgets
    let mut keyboard = HidKeyboard::new()?;
    let mut mouse = HidMouse::new()?;

    // Place cursor to the top left so we initally know it position
    mouse.cursor_home()?;

    // Load the templates
    let templates = load_templates()?;

    // Initialize the video capture device
    let mut cap = capture_init()?;

    // Main fishing loop
    loop {
        // Cast fishing
        keyboard.key(0x1f, KeyAction::Tap).unwrap();

        // Wait for bobber beeing placed
        sleep(Duration::from_millis(2500));

        // Capture a frame
        let mut frame = capture_frame(&mut cap)?;

        // Detect bobber on caputre frame
        let lure_location = find_bobber(&frame, &templates)?;

        // Create rectangle surrounding bobber
        let lure_location_rect = Rect::new(lure_location.x, lure_location.y, templates[0].cols(), templates[0].rows());

        // Move mouse to bobber location
        let bobber_x = lure_location_rect.x + lure_location_rect.width / 2;
        let bobber_y = lure_location_rect.y + lure_location_rect.height / 2;
        //mouse.cursor_home()?;
        mouse.cursor_move(bobber_x, bobber_y)?;
        //mouse.cursor_move(200, 200)?;

        // wait so the splash detector is not disturbed by the moving cursor
        sleep(Duration::from_millis(600));

        // detect splash
        let splash_detected = wait_for_splash(&mut cap, lure_location_rect, timeout)?;

        if splash_detected {
            mouse.button(Button::Right, ButtonAction::Click)?;
        } else {
            println!("Timeout occured while waiting for splash")
        }

        // Random delay before repeat
        random_delay(1000, 8000);
    }
    // Clean up the video capture device
    capture_cleanup(cap)?;

    Ok(())
}
A word about detectability
So are we totally secure from anti cheat now? No, of course not. While this project avoids having any detectable computation or software on the PC running the game, that only covers a part of the picture. There are still several ways this setup could be flagged and of course there may also be detection methods we aren’t even aware of.
One example: in some shooters, cheaters were caught because anti cheat detected that an Arduino or similar device was connected to the PC. Even if you spoof the VID/PID to look like a genuine keyboard or mouse, there might be other ways to analyze whether the device is actually legitimate.
Another weak point is mouse movement. Right now, the bot moves the cursor to the bobber in perfectly straight lines. That’s not very human like. A real player’s mouse path is far less predictable. For example, using Bézier curves (or similar techniques) could make the movement appear more natural and less robotic.
Finally, there’s server side behavior analysis. We don’t know the details of Blizzard’s systems, but it’s safe to assume that nonstop fishing at the same spot for hours would be suspicious. As one example, leaked code from the Turtle WoW private server shows how simple rules can be: their OnFishingAttempt function flagged players who fished more than 30 minutes without taking a break longer than one minute. It assumed real players don’t fish continuously for that long, while bots often do.
So yeah, while the bot is technically functional, it’s still far from acting like a real human player and is by no means undetectable.
Conclusion
Ok, this concludes my little POC fishbot project. It is far from perfect, but since I do not plan on actually using it and was mostly just interested in the technical challenge, I will stop here. It was a fun mix of hardware, code, and WoW nostalgia. If anyone is crazy enough to build on top of this, have fun and good luck.
One last thought: with more capable hardware this concept could go far beyond a fishing bot. Modern computer vision models like You Only Look Once (YOLO) are already used in many legitimate contexts for fast object detection. Hooking something like that into a hardware pipeline would in theory make much more complex automation possible, even in fast paced environments like shooters. That is not my goal here, but it shows how quickly simple tinkering projects connect to much broader topics in machine learning and computer vision.
Disclaimer: I don’t support cheating in online games, especially when it affects other players. This project is created purely out of curiosity and for educational purposes. I didn’t test it on any official Blizzard servers, and I don’t recommend using it on retail, as it could lead to a permanent ban. While the bot should work with the latest version of the game, all my testing was done on private servers where no one else’s experience was impacted. Please behave.